Yes, I needed a change of pace - a quick-er pick-er up-per.
I had already bought these fabrics just for making pillowcases - except for the fabric left over from my dress (upper left fabric):
So far, I have finished the white pillowcase liners, shown underneath at the right, and the red print pillowcases. Since this fabric has printing along one edge, I sewed the pillowcases with the printing at the opposite end from the hem so I could cut off the words:
This is my quick version of pillowcases. I use the full width of the fabric, preferably in the 42- to 45-inch range. I always buy 1-1/4 yards of woven cotton fabric for each pillowcase and prewash (washer and dryer) three times before cutting it out. I cut across one end to even the fabric. The liner fabric is shown here with the big ruler ready for the cut:
First I measure 21" from the trimmed edge:
Then I roll up the fabric, skootch it across the cutting mat, and cut another 21" beyond that, for a total length of 42".
Note: When making pillowcase liners, the second cut is 20" for a total length of 41". This tutorial was originally written before I started to make the outer pillowcases bigger.
Here are all my printed fabrics on the ironing board, ready for the next step:
I used a selvage for the hems of the printed fabrics, but the white fabric had two unfinished selvages. I serge-finished one edge of the liners for the hem.
The fabrics were folded crossways, which folded each selvage in half. A pin was placed three inches from the selvage at the cut edge ...
... and at the folded edge:
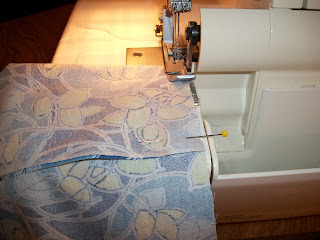
I used the pins to fold the hem down:
I pinned all along the cut edge:
Here is a pile of pillowcases ready to be stitched:
I stitched them together on the serger, making it a quick project. I started at the hem, leaving a thread tail:
I stitched down the length of the pillowcase, angled in a bit at the end, and stitched off the fabric. I then stitched across the end of the pillowcase, crossing the previous stitching at the side, and tapering in at both ends of that stitching. This tapers in the corners just a little bit. This is when the printed selvages were cut off:
I used a double-eyed needle to tuck in the thread tails. At the hem, I weave the needle between the hem and the pillowcase, pointing it towards the fold of the hem, and then out:
Once the needle is in place, I thread the tails into the needle and pull it back out.
When the thread tails are too long, I trim them.
Next, I steam press all the stitching, and then I pin and press the three-inch hem in place:
I stitched the hems in place along the selvage edges using my sewing machine:
Here is the end result:


What a lovely way to freshen up a room- those look great!
ReplyDeleteYeah, they are "different!" It could have been a dress, but I already have enough red in my wardrobe - trying to balance it now with the blue side of the color wheel!
DeleteI love your pillowslips! Where do you find a double-eye needle? I tie my thread ends back in all the time at the end of pockets and topstitching, but it takes more time with only one eye!
ReplyDeleteI probably bought the double-eyed needle at Nancy's Notions. I just looked, and she still sells them.
Delete